
Loading...
Postulate is the best way to take and share notes for classes, research, and other learning.
From Zero to One: 2 Weeks of Web Development
 Laura Gao
How does it feel like to know absolutely nothing?
Think about the most nothingness you can possibly know about your field. Then think again, because a beginner will feel more nothingness than the nothingness you are capable of picturing.
What was it like to use Discord for the first time? You don't get the concept of a "text channel" vs a "voice channel." What are these words with hashtags in front of them?
What was it like to open Photoshop for the first time? You don’t know that the brush tool will allow you to draw on the screen. You don’t know that the toolbar is called a toolbar, or that the brush tool is called the brush tool. You don’t know how to delete something that you had just drawn. You don’t know how to create a selection, much less know that ctrl+d is how to deselect.
What was it like when you used a computer for the first time? You would stare at the screen; you have no idea what to do at all. Don’t know what that bar at the bottom does. Don’t know how pressing down on the left side of your mouse while your cursor on an icon would change the carefully crafted pixel patterns on your screen.
But of course, we go through most of our days forgetting how that feels. Our subconscious habits direct us to the tools we are familiar with. When you know something — anything — about a field, it’s hard to picture nothingness. Such is the way with experts failing to sympathize with beginners, such is the way with most of our lives.
On Tuesday, May 5, I knew nothing about web development beyond HTML/CSS static sites. I didn’t know how to use the terminal at all, instead, pushing to GitHub by manually uploading each file. My only experience with “programming” was some Python from some misadventures with quantum computing, and a Khan Academy JavaScript course that didn’t teach actual JavaScript. Over the last 2 weeks, after a series of YouTube videos, playing around with the established Updately repository, and experiencing the exhilaration of my own Vercel builds deploy, over time I built up a good big picture understanding of how React apps are structured. I felt good. I felt like I knew what I was doing.
But oh, how quickly do we forget where we come from. In the moment of scraping your knees, your vision is consumed by pain. Life hurts. But 5 mins after you’ve been relieved from your pain, how quickly do we go back to our own ways. How quickly do I forget the utter nothingness I felt just two dozen days ago.
This blog post is a mega compilation of everything I learned in past 2 weeks of having software dev as my sole number one priority, working on dev every day. I’m writing this partly for personal knowledge management, following Samson’s thesis “I haven’t learned something until I published about it.” I’m dumping here all the React, Git, API functions, etc I learned. Out of everything in React & APIs especially, I think what would’ve helped me the most was an understanding of the big picture structure, of which I didn’t fully grasp until a bit later. And so, I’m writing what I wish I had known back when I knew nothing about React.
And, I’m writing this partly because I want to show my own dev progression, illustrating my minimum-tutorial first-principled approach to learning new frameworks. I want to remember how I felt.
For a consulting challenge with the United Nations that aimed to increase female employment in the digital economy, I had preached about using project based learning to learn to code. Ironically, while looming in the back of my head that I didn’t know how to code. I had built some form of identity around I want to go into software engineering yet I didn’t know any JavaScript. I wanted to change that.
An itch had been building up over the past few months to build a webapp that runs a quantum machine learning algorithm on the backend. This started when I heard Evan Lin talk about how a lot of projects just have code just sit around in a GitHub repository till the end of eternity. “So I realized as I was doing these projects,” he says, “that I wasn’t really gaining anything and people can’t interact with them.” And so, after he built a natural language processing algorithm that classifies the sentiment of a sentence, he didn’t just leave the code lying around. Instead, he made it into an interactive webapp, where users can input sentences of their choice and receive a sentiment classification. Anyone, technical background or not, can test out the algorithm without reading a single line of code, and instead, with a clean easy to use UI:

As I wrote in a previous dev post:
2 months ago, I spent ~20 hours building a quantum approximate optimization algorithm that solves the maxcut problem. Given a graph, the algorithm would determine which line cuts through the most of the edges. Pretty neat, right? After a few hours of headaches, the code worked and got picked as a QOSF model submission. However, it sucks that only people with an understanding of quantum computing code can appreciate it. I mean, just look at this code 🤮. Who wants to dig through it to test it out? One has to download the notebook and manually install all the Python packages to adjust the inputs in order to verify the algorithm works.

How cool would it be to build a similar webapp that runs my quantum computing algorithm on the backend? Think about all the ways you could market it — “the first of its kind that allows anyone to run a quantum machine learning algorithm…”
So project based learning it is, and Maxcut became the project that would be my north star for the next 2 weeks.
I’ve heard the term React.js tossed around before, I’ve watched its fanboys preach about it (back when I watched tech YouTube to pretend to myself that I know how to code), and React is what Evan used, so I decided without much research that React was the way to go with my first webapp.
I remember after staring at a React app boiler plate for the first time, scared to delete the redundant logo.svg files that came with the boiler plate as I might mess up something.
Where do you go when you know utter nothingness like this? I started by entering “react” in the Google search bar — the most basic thing you can do. The first thing that came up was the React documentation.
I dug around, making my way to the “Learn” section.
The most basic React is having a single HTML element with an ID. The React will get the element by that ID and insert HTML items into it.
<!-- html file -->
<div id="root"></div>

// js file
ReactDOM.render(
 <h1>Hello, world!</h1>,
 document.getElementById(‘root’)
);
However, the HTML that you write within the JS file isn’t exactly HTML. It’s called JSX, standing for JavaScript syntax extension — basically, allowing you to write HTML-like-syntax in a JS file. There are a few differences: firstly, you can reference JS variables or functions by putting them in curly braces.
// js file
const title = "Hello, world!"

ReactDOM.render(
 <h1>{title}</h1>,
 document.getElementById(‘root’)
);
You may also use curly braces to embed a JavaScript expression in an attribute:
const element = <img src={user.avatarUrl}></img>;As JSX is JS, ultimately, it uses camelCase for naming.
const element = <div tabIndex="0"></div>;JSX lines are JS objects. So you can return HTML lines in functions.
const title () => {
 return(
  <h1>Hello, world!</h1>
 )
}
Don’t learn JS and React at the same time, the docs advise me. Which is why that’s exactly what I’m going to do. The CodeAcademy beginner JS course was 30+ hours — that’s a lot of time learning a language without a direct project in mind. Doing coding courses feels sluggish, and after a while, my brain would start to subconsciously optimize for getting courses done and earning CodeAcademy badges instead of building a project — what really matters.
I’m learning React while only knowing HTML, CSS, Python, and half of JS syntax. Time to clown myself.
JSX, alongside some basic JS syntax, is what I learn from React docs. Nice start, but it leaves me unsatisfied — I’m just learning tidbits of information without seeing the big picture of how they connect. At this point, I don’t fully understand what a component is. Heck, I don’t think I knew what “component” meant at that time. I don’t understand how different JS files interact with each other. I was still scared to take the plunge by making my own modifications to the boiler plate code, because I didn’t know what component functions did.
What would be nice is if I can build a project. Naturally, I will need to understand React holistically if I were to do that. On Wednesday, May 5, I type “react js” into the YouTube search bar, and a Learn React In 30 Minutes video catches my eye. Here, we would be building a todo list webapp. A project — just what I wanted!
There, I learned to install npm via a regular windows software installer wizard. Create a folder that you want to house your React app in, and open that folder in VSCode via File > Open folder. npx create-react-app . in the VSCode terminal creates a React App in the directory you are currently in — this initalizes boiler plate files such as index.html, index.js, and App.js. index.js points to adding App.js contents onto index.html, which is the file that gets rendered. So to modify your react app, you modify App.js.
Now, I’m starting to see the big picture.
To render a JS file in index.html:
ReactDOMrender(<FileName />, getElementById('root')But actually, we don’t need to know this, since we never need to write this line of code — it’s all set up for you in the boiler plate.
npm start loads the React app in browser on https://localhost:3000 . Localhost automatically updates without the need for you to reload! This is the first way I noticed that React was better than static HTML dev, where you have to refresh your page every time you make a change in order to see changes.
The core value proposition of React over vanilla JS is that it allows you to reuse code via “components.” Each JS file is a component. Thus, App is a component because it’s in App.js. To import it into index.js, use
import App from './App';And then insert it with App as the component name. The convention is that component names start with capital letters.
ReactDOMrender(<App />, getElementById('root')The contents of any component is just a function — arrow function or otherwise. Component functions return JSX. Let’s say we make a header component.
// Inside components/Header.js

const Header = () => {
 return (
  <h1>The Prioritizer</h1>
 )
}
To use a component inside another component, you just return it inside the file.
// Inside App.js

return (
 <Header />
)
We can also pass any props through our embedded tag. This will be very useful later:
// Inside App.js

return (
 <App title="hello" subtitle="A dream written down with a date becomes a goal. A goal broken down into steps becomes a plan. A plan backed by action makes your dreams come true." />
)
// Inside components/Header.js

const Header = (props) => {
 return (
  <header>
   <h1>{props.title}</h1>
   <p>{props.subtitle}</p>
  </header>
 )
}

/* props is an object that looks like
* props = {
*  title: "hello",
*  subtitle: "A dream written down with a date becomes a goal. A goal broken down into steps becomes a plan. A plan backed by action makes your dreams come true."
* }
*/
You can also have default props, which will be used if no props are passed though. Put this below the function in the JS file:
Header.defaultProps = {
  title: 'Task Tracker',
}
But after this tutorial, I realize that I was getting confused. All the .map() and .filter and => confused me. I didn’t know that arrows were representing function declaration— I thought text messages were the only place where => meant an arrow!
Of course, this was expected, because this kid doesn’t know vanilla JS.
And so I look up vanilla JS.
Vanilla JavaScript
Here’s a dump of some js syntax that I didn’t know before.
In JS, “blocks” are layered inside curly braces, the equivalent of Python blocks indicated by indents.
Usually, function definitions look like this:
function message() {
 return "Hello World!";
}
Arrow functions are just a different syntax to say the exact same thing. Here’s the arrow function equivalent of the above
const message = () => {
 return "Hello World!";
}
You can also implicitly return the string:
const message = () => "Hello World!";That does the same thing. Arrow functions implicitly return what we put after the arrow.
To use parameters:
const message = (a) => `Hello ${a}`;For those who know Python, ${} is the JavaScript equivalent of a Python f-string.
Just like Java, you need a semicolon after any line that’s non-curly-bracket.
Arrow functions make your code shorter and more concise. Now, you feel pissed that there’s something extra that you have to learn but I bet someday you’ll love their existance, the video tells me. You’re right I am indeed pissed right now, I scoff back. But OK then, if you say so. Bet. Let’s see.
? = then
: = else
&& = then without needing an else
.map()
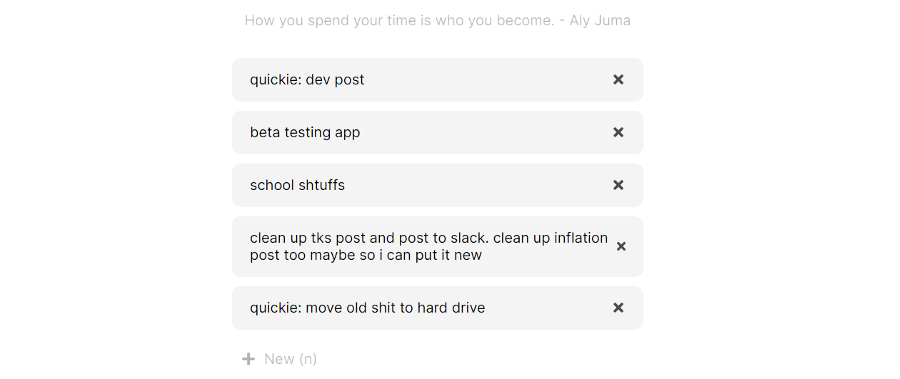
Let’s say we have an array of objects, tasks .
const tasks = [
 {
  text: 'clean up tks post and post to slack',
  id: 0
 },
 {
  text: 'set up beta testing manager backend',
  id: 1
 }
];
We want to display each of the tasks. I thought to use a for loop, but turns out that’s not how to do it. There’s an easier way.
tasks.map((task) => (<h3>{task.text}</h3>))The purpose of .map() array method is to display each array element. .map() takes in a function.
.filter()
We want to render only tasks that do not have the same ID as the one we’ve pressed delete on. I thought to use an if else statement. Once again, I was wrong. Once again, I was wrong because I didn’t know array methods.
setTasks(tasks.filter((task) => task.id !== id)).filter() is used to get a certain section of an objects given a boolean statement that is passed through a function.
Is this enough Vanilla JS? I watch this video — titled “Whats the MINIMUM JavaScript needed to learn react?” — and I get a list:
Recursion, loops, closures, conditionals = musts.
Webpack, babel package, managers, yarn
Ajax
Promises — at least know their basics
Await/async
Localhost
Data structures — objects, arrays, and different type of stuff
Lexical scope = the scope within the function whose variables can only be accessed within
ES6
Classes
Imports/exports —I can figure this out by looking at the code I think
Arrow functions
Spread operator
Array methods
.map
.filter
.reduce
Destructing
Importing pieces of files from modules
Hmmm... I know about half of that. But that doesn't matter, Laura does not learn from the ground up. It's much more exciting to move forward with React, figuring out what I need as I go.

Image source: u/Aedene in r/ProgrammerHumor
Hooks
And so, next up, I went back to React, this time following a longer, 2 hour React crash course which I hoped it would be more in depth. I wanted to build more intuition about how React works at a high level.
useState
Function components have these things called hooks. The first one is useState, which returns returns a state value and a function to update it.
import { useState, useEffect} from 'react'
const [tasks, setTasks] = useState( [{
 text: 'clean up tks post and post to slack',
 id: 0
 },
 {
  text: 'set up beta testing manager backend',
  id: 1
 }
] )
In this case, tasks is the variable from which the list of objects is accessed; setTasks is a function to set the variable.
States are immutable. State variables are not something you can directly change—you wouldn’t use something like tasks.push() to add an element to it. To do that, you would have to recreate the variable, add a task to it, then reset the variable using setTasks .
// Add task

const addTask = (task) => {
 const id = Math.floor(Math.random() * 1000) + 1
 const newTask = { id, ...task}
 const newTasks = [...tasks, newTask] // Recreate tasks with the spread operator
 setTasks(newTasks)
}
The spread operator: ...tasks recreates what's already in the tasks variable.
A state variable can be anything — a string, a boolean, an object, or an array of objects, like this one.
Why hooks and not just regular variables? I don’t know.
But we don’t want tasks in our tasks file. We want to put it inside App.js, into a global state (because it needs to be accessed outside the tasks file) and then we can pass it down it into the components we want.
// in App.js

<Tasks tasks={tasks} setTasks={setTasks}/>
// in Tasks.js

function tasks( { tasks, setTasks } ) {
 return (
  <div className="tasks">
  {tasks.map( (task, index) => (
   <Task task={task} />
  ) )}
  </div>
 )
}

export default tasks
useEffect
The useEffect hook allows us to execute certain lines of code every time something is changed. For example, we change our stored tasks every time the tasks state variable changes. Here's the basic idea: useEffect(() => {function call, [whatChanges]})
useEffect(() => {
 localStorage.setItem(LOCAL_STORAGE_KEY, JSON.stringify(tasks))
}, [tasks])

// Any time our list of tasks changes, we want to change our stored tasks
Also, I think React auto-refreshes the window a few times ever second. This explains the earlier phenomenon of how changes in code files automatically get rendered in the localhost window. So, if there’s a variable you don’t want to be constantly be refreshing, you put it inside a useEffect.
useEffect(() => {
 const storedTasks = JSON.parse(localStorage.getItem(LOCAL_STORAGE_KEY))
 // json.parse converts the stored string into an array.

 if (storedTasks) setTasks(storedTasks)
}, [])

// Because the empty array never changes, we only call this function once. We only want to set our tasks to our stored tasks at the beginning of a user opening the webapp.
I think this might be the answer to my original question — you use useState array instead of a regular array because you don’t the tasks array to refresh itself; you don’t want the tasks to revert to the original variable declaration every second.
— — React basics over — —
Tutorials are great for two things. One, for getting your foot in the door, into a completely new framework that you have never touched before. Because if you’re paralysed by the knowing-nothingness of a completely new framework, you have no idea where to experiment even if you wanted to. You may mess around a bit, get an error, have no idea where the error comes from, and get discouraged quickly. The great thing about tutorials is that the person telling what to do has already figured everything out. You can be sure the instructions work. You can be sure that you won’t run into any pesky errors.
Two, for discovering new things. You don’t know what you don’t know, and often you can’t find out what you don’t know just by project based learning. Project based learning is great when have a vision of the end product and you work towards it, picking up tidbits of JS you need along the way. But you won’t have a goal to implement something that you don’t know yet is possible.
However, it is this exact greatness of tutorials—the certainty that they are bug-less—is what hurts you after a bit. Because everything is too straightforward, you can’t follow a tutorials to become a good dev, nor can you feel confident in your software development capabilities even after watching thousands of lectures. In actual dev, there are bugs. It is not straightforward. Software devs famously spend 80% of their time debugging and 20% writing code. There are frustrations—lots and lots of them. Tutorials don’t have that.

And so, after a while, the tutorial felt monotonous — just same repetition of press play on YouTube, copying the tutorial's code into VSCode, and see it render onto my browser. The first few times, I felt elated seeing my React files load out onto my localhost URL. But soon, that elation became empty; it was without accomplishment. Had I watched 9 hours of tutorials, I would not have felt like I knew basic React as long as I hadn’t built something on my own.
I want to test my knowledge by trying to build things on my own — that will truly demonstrate mastery of React.
So, on the morning of Saturday, May 8, 50 mins into the tutorial, I abandoned it. Now, I can follow the project based learning framework —having a vision of what my final taskboard would look like and figuring out what I need as I went. I started by changing the design to match what I want — although CSS is familiar, seeing it work as expected in React solidified my confidence.
Next, I took the plunge into adding features in React. I implement local saving using useEffect.
Then, I implement keyboard shortcuts following this tutorial, in the way I like it so that I can add a task without using mouse at all. I still don’t fully understand how these event handlers work, but it works 😅
I implement drag and drop by following this awesome tutorial. React beautiful DND makes it so easy. First install, then import by:
import { DragDropContext, Droppable, Draggable } from 'react-beautiful-dnd';Inside tasks.js, I wrap all the tasks inside a <DragDropContext> tag. I wrap all tasks inside a <Droppable > tag, giving it a droppableId of tasks-master (this could be anything).
Use an arrow function, we map the provided object over our document, over everything inside the <Droppagle > tag.
Then, you wrap each list item inside <Draggable> to create a list of draggables instead the list of <h3>s that we have before.
Next, we add these attributes to the <h3> tag:
<h3
 ref={provided.innerRef}
 {...provided.draggableProps}
 {...provided.dragHandleProps}
>{task.text}<h3/>
Finally, attach a function to the onDragEnd attribute of <DragDropContext>, which actually modifies the task array.
<DragDropContext onDragEnd={handleOnDragEnd}>

const handleOnDragEnd = (result) => {
 if (!result.destination) return;
 const items = Array.from(tasks);
 const [reorderedItem] = items.splice(result.source.index, 1);
 items.splice(result.destination.index, 0, reorderedItem);
 setTasks(items)
}
And now here’s the entire code, extending on the previous tasks.map((task) => (<h3>{task.text}</h3>))
function tasks( { tasks, onDelete, onToggle, setTasks } ) {

const handleOnDragEnd = (result) => {
 if (!result.destination) return;
 const items = Array.from(tasks);
 const [reorderedItem] = items.splice(result.source.index, 1);
 items.splice(result.destination.index, 0, reorderedItem);
 setTasks(items)
}

return (
 <DragDropContext onDragEnd={handleOnDragEnd}>
  <Droppable droppableId="tasks-master">
   {(provided) => (
    <div ref={provided.innerRef} {...provided.droppableProps} className="tasks">
    {tasks.map( (task, index) => (

     // create a list of draggables
     <Draggable key={task.id} draggableId={task.id.toString()} index={index}>
     {(provided) => (
      <h3 ref={provided.innerRef} {...provided.draggableProps}  {...provided.dragHandleProps}>{task.text}<h3/>
     )}
     </Draggable>

    ) )}

    {provided.placeholder}
    </div>
   )}
   </Droppable>
  </DragDropContext>
 )
}
Now, drag and drop works!
.gif)
On Thursday, I tell Samson about my newest endeavour to learn React. I had looked up to Samson a lot in software aspects — he was building Postulate, a software startup & the platform you’re reading this on, and I think reading about his software journey is what excited me into getting into webdev. If you’re reading this, you may already know what Postulate is, but you may not know that its founder has also built a social platform for daily updates. Cool, he says, you wanna help me put some features into Updately? It might be too advanced for you but it may help you learn. Why not, I say. So on Sunday, May 9, I find myself on another call about to start a new task.
I clone Updately locally. This is my first time using Git. He shows me how to use Git; it’s actually pretty easy. You just git init in command line (or in VSCode terminal), and then the folder you are in will have a Git repository. You make changes to your file, then you can use git status to check that Git has seen the files were changed. git add App.js to add a file to the git staging area, or git add . to add all changed files. Then, git commit -m "commit comment" to commit these changes. You want commits to be relatively bite-sized changes so it makes it easy for you go to back on, Samson says. Then, git push to push it onto your GitHub repository. That's the basic flow — a total of 5 commands. (Thank you Samson for being patient enough to walk me, a Git noob, through this.)
How does GitHub know where you push? When you create a new repository in GitHub, it will tell you what to do. Github will give you a command to use in your terminal. And you just use that. Pretty easy.
Here are some non-mandatory commands that I found useful and made me feel more secure when I learned Git for the first time: git diff shows you which lines were changed. (Beware: use q to exit — this tripped me, I kept trying to hit the esc key.) And git logs shows you your commit history.
I think not knowing how to log in and not knowing how to set a remote origin to push to was a barrier to learning Git earlier. I did have to log in on Sunday, but now, I forgot how to log in. Already, I have forgotten. True that I have Git logged in on one computer, I don’t need to worry about ever logging in here again. So I guess this forgetting doesn’t affect me.
This attitude is a prime example of how after you learn a bit, you get cocky. You forget how you used to feel.
How quickly do we forget where we come from.
I had learned Git, and with that, I had forgotten my months of not knowing it.
— — I ship the todo list, now rebranded to The Prioritizer.
Typing git push is one of the most exhilarating things in the world when you know you have finished making all the modifications and commits that you need, and you are finally ready to add your code into the cloud. Put it out into the vast online world.
Deploying to Vercel was surprisingly easy — I don’t need to write any instructions here; just follow the steps given in its UI.
Seeing the Vercel build play out were 2 mins of intensity. And then, it succeeded. Vercel — thank you for throwing confetti when builds succeed. Seeing the confetti rain down as tears rained down my face and rain rained down my window was fitting. Vercel’s confetti — the only place where my hard work is recognized, I thought as I sat in the corner of my closet alone.
You can see it here. The app’s functionality is based off of my own time management system, and an explanation of that is included. Try it out, maybe. Let me know if you can see it being useful in your life. If my time management system sucks, let me know too.
And here is the code.
— —
I spend the next few days — Sunday to Tuesday — on Updately.
The thing about Updately is that all the groundwork was laid out; all I needed to do was to play around with the details. I didn’t need to intialize a Next.js app. I didn’t need to set up any MongoDB or NextAuth or Tailwind CSS or Typescript. I didn’t completely grasp how Next.js apps were structured (they’re a bit different from React — one being no index.html) — I didnt even know what _app.tsx or _document.tsx did (the documents that “replace” index.html).
The first thing I did was implement pagination on the home and explore page. The task was clear in front of me — Samson gave me these steps:
To implement pagination
Create an API route
Create useSWR request in page
Add buttons/state to control pagination
The first two deal with API functions, which I was completely clueless about.
API functions basics
Written in language that makes sense to me & may not make sense to you, with a focus on the big picture.
Next.js is an interesting thing that combines both frontend (React) and backend (Express?). I understand the React stuff for the most part. But to do the backend stuff, do it in a .ts file within the pages/api folder.
A simple demo is to get whether session exists based on our request:
const session = await getSession({ req });`req` is request; `res` is response. `getSession()` is a function declared elsewhere that we have to import.
Samson did the first two steps with me. Inside pages/api, we made a get-curr-user-feed.ts file, which we call from index.tsx using
const {data: feedDataObj, error: feedError} = useSWR(`/api/get-curr-user-feed?page=${page}`, fetcher)This feedDataObj contains our updates. More specifically, feedDataObj.feedData contains our feed data.
In get-curr-user-feed.ts , we return using line of code if successful:
res.status(200).json({userData: userData, feedData: feedData});res.status() sets the JSON we return as an object with feedData as one piece, which is why in the frontend, feedDataObj.feedData contains our updates.
const {data: feedDataObj, error: feedError} = useSWR(`/api/get-curr-user-feed?page=${page}`, fetcher)How API function gets data from backend
in get-curr-user-feed.ts, we call a getDemoFeedRequest function from requests.ts. In requests.ts, we get our updates with
const updates = await updateModel.find().sort('-date').skip((+req.query.page - 1) * 10).limit(10);And that is the answer to pagination. Using .find() .sort() .skip() .limit() is how we get pagination. More details in Samson’s blog post.
Parameters in API functions
Remember how we called our API from the frontend like useSWR(`/api/get-curr-user-feed?page=${page}`, fetcher); ? ?page=${page} is the parameter part. For context, page is an number state variable inside the frontend. We pass this integer to our API function which passes it to requests. and then we can access this page parameter using req.query.page .
I spent a good chunk of Sunday afternoon blankly staring at the React file. Following Samson’s nicely laid out blog post while having the Postulate repository (with pagination already implemented) as guidance, I figured it out after a while. The main thing that allowed me to figure it out was, believe it or not, clicking on the getDemoFeedRequest function and realizing it pointed somewhere that fetched from MongoDB and used the skip and limit mentioned in Samson’s blog post. Then, it all made sense.
Next, I did the same thing in the explore feed. Makes sense.
Then, pagination on the user profile feed. And then, I limited the number of updates on the the page feed to 10. Similar deal. Once I understood the overarching structure from frontend to API route to requests.ts, it all made sense.
Finally, notification overflow. The problem was that on Updately, I was perpetually stuck at 33 unread notifications. When the amount of notifications went over how many can fit on a page, there was no way to scroll down & mark them unread; they just overflow off the screen. (Just like Postulate right now).
However, authentication was buggy and for whatever reason, I couldn’t log in to the localhost version of Updately. This meant I couldn’t fetch notifications to test out any code changes. To fix this, I artificially got notifications without logging in. Firstly, I got rid of showing notifications only when session exists and instead it will show notifications at all times. Secondly, in the getNotifications API request, I just changed get notifs based on session.user.email to my email. Then, in the navbar component, anywhere session.user.email was asked for, I switched it out with a string of my email. This fetched the notifications associated with my account.
Once I fetched the notifications, it was easy to identify where to make the change: in fact, I only needed to modify one line of code as you can see on this commit: add the Tailwind CSS classes of max-h-96 and overflow-y-scroll to the div that contains all the notifications. The former restrains the height of the notifications div to be 400px, the latter causes you to be able to scroll down when notifications went over the max height.
After noticing where this commit is needed, I used git restore to get rid of all my changes since last commit. Then, I added this one change and made the commit.
Git is nice.
— —
Those were the 4 things that Samson laid out for me to do, and so, I pushed them to GitHub, pull-requested, & waited.
In the meanwhile, I went back to my Maxcut webapp — the one that started it all.
Maxcut frontend
The frontend was pretty straightforward. Since I understood React big picture, all the frontend functionality I needed for this project — how to get inputs, hooks, & everything was all good and dandy.
The one place where I went through some trouble was how in the maxcut webapp, inputs are not given by one input field, as in The Prioritizer and most input forms. Instead, in maxcut, you input each of the edges separately. Here’s what the input field looks like:

I wanted to store these values in a 2D array, like this:
edges = [['0','1','0.7'], ['2','3','5'], ['2','0','2.2'], ['0','3','2.5']]

// The value of edges would be ^^; but the above line of code is a simplification. In reality, I won't write that above line of code because edges is a state variable.
Which meant the onChange handler would have to take in the edge number and whether it’s a node1/node2/weight as parameters. I didn’t know how to get the onChange handler to take in parameters. I spent 3 hours trying to find this out — digging around the Internet, and unable to find anything. Turns out, small trivial questions like these don’t have clear answers online, maybe because everyone already knows the answer and only few noobs like me don’t.
Basically, I was trying things like
<input
 onChange={() => (handleChange(edgeIndex, 1, event))}
></input>
And didn’t know why event returned null.
But TL;DR here’s what worked:
// JSX
<input
 onChange={(event) => (handleChange(edgeIndex, 1, event))}
></input>
You just have to capture event in the left of the arrow. With that, the handler function is able to access any parameters as well as the event.
// handler function

const handleChange = (edgeIndex, vertexIndex, event) => {
 // ... whatever you want to do ...
 console.log(edgeIndex, vertexIndex, event.target.value);
}
Maxcut backend
With that, the frontend was done. To set up a Python server that runs my quantum machine learning algorithm was surprisingly quick — I accomplished this in one Thursday afternoon. What wasn’t so quick is finding out how to use API requests to send and fetch data to it, which took me until Saturday because of CORS errors. After figuring it out, I wrote about how it’s done so I can do it again easily in the future with my own blog post as guidance. TL;DR I just put my entire algorithm inside a Flask route and used an Axios post request to send data back and forth.
By Saturday, May 15, I was able to write inputs on my localhost version of the app, and receive the answer from a quantum algorithm — exactly what I had planned what the user flow of my app would be. The app was able to do this:

This is also what I wrote out earlier as criteria a MVP of my app would meet in Obsidian notes:

With the backend & API routes working, on top of a recent breakthrough in figuring out the frontend, I thought I had figured out the hardest part.
Boy, was I wrong.
Over and over, the cycle repeats. Just as you think you are done, you face a bug that you didn’t know was possible.
The first issue came when I deployed. The frontend deployed successfully on Vercel, as expected. The backend, however, did not.
Evan, who I based my project off of, has used Heroku to deploy his Flask backend. So I thought I’d do the same. However, my virtual environment ran into problems and requirements.txt became huge — with 137 lines, mostly packages that I didn’t touch. And so, Heroku wouldn’t build properly, as one of those extra packages that the virtual environment randomly added couldn’t get installed into the Heroku build.
And so, I booted out the old virtual environment by manually deleting the .env folder. Then, I set up env again, using the instructions I previously laid out in my previous blog post about Flask. Ahh, this is the greatness of personal dev blogging.
This time, the Heroku built successfully. Now, everything must work, right? Now, with both builds working, what can possibly go wrong?
But the frontend, when calling Heroku backend, still kept returning errors. So I installed the Heroku command line interface, and in the holy grail of VSCode terminal I type heroku logs --tail --app maxcut-backend . This is used for debugging; it basically outputs a stream of your webapp’s activity.
I see my print statements outputting in the terminal and the of cost function going down but then suddenly — timeout error.
Turns out, Heroku has a 30s timeout limit. If the server doesn’t provide a response within 30 seconds, the app returns an error.
My QML did take an eternity to train. I didn’t time it exactly, as I had ran out of patience even waiting for my own app, but my guess is 3–5 mins. Way overtime.
So I try to reduce it by tweaking hyperparameters. I brought down number of shots from 100 to 50 and number of training iterations from 100 to 25, which still outputs correct answer to my 4-node-4-edge graph.
Now, training time is around 50s. I try to bring it down lower. Nope. 15 iterations or 40 shots returns an inaccurate answer.
So I look for a way to bypass it. I find this — which asks me to make another function inside the main Flask route function and use `yield` statements instead of return statements — the idea is that yield statements will bring back a value to the browser while the Python keeps running.
However, functions that use yield instead of return are not any regular function. They are “generators” and return “generator” values.
And so, I spend 3 hours learning what a generator is and how to use yield.
I give up on JSON-ifying my response value and instead just sending a string back to the frontend (instead of a JSON object). Sorry if this is sacrilegious.
But nevertheless, now, the frontend is able to successfully receive the output from the yield statements.
I deploy to Heroku, crossing my fingers and holding my breath as I click "calculate maxcut" for what I hoped would be the final time.
It worked… once. And then it fails. Fails. Fails. I try again 20 times and it works once.
Technically, my app works now, and I had seriously considered shipping it officially right then and there. But man, you can’t consider yourself to have high standards with something that works 5% of the time.
In Heroku logs, I get code=H18 desc="Server Request Interrupted" . What does this mean? The docs tell me:
“An H18 signifies that the socket connected, some data was sent as part of a response by the app, but then the socket was destroyed without completing the response.”
Huh. That looks like a timeout error. The socket (app) was destroyed before completing the response means that since the app’s response didn’t come on time, it was destroyed. Or so I thought. Looking back, maybe that’s not entirely what it means. But either way, I’ve given up on Heroku.
During these moments of frustration, I had sworn to write a mega blog post about it later. This is part of the reason I’m writing this now — I guess, to honour how my previous self felt. Actually, I had wanted to make a YouTube video about my dev process. But that's too much work, and instead, I’m writing a post — the next best thing? Maybe this will pave the way for a video later, who knows.
I search for other bypassing techniques — I see stuff about threading. Maybe I could try implementing... nah, screw that, I was lazy. I was done. I want to give up on Heroku.
Why do I even need Heroku at all? The thought of trying out an entire service altogether felt like rainbow-unicorn-land to my eyes that has only seen Heroku errors for hours. The timeout for Google Cloud hosted apps is 5 mins — if I could get my app to work there, it would be magical.
So, I try to do just that. This is how to deploy a server to Google Cloud — this link contains all the instructions. But if those steps look needlessly complicated, here’s the TL;DR: go to this link, click Create Service, and follow the steps that are laid out in the user interface. When they ask you for the build file directory, just put a single forward slash (/) . This is a mistake I made — somehow I thought it would be a good idea to put it requirements.txt or app.py. And this is what caused a large chunk of those failed builds.
If you look at my Google Cloud build logs — there are far more failures than successes. Getting rejected by cold outreach is one thing, but getting rejected from your deployment service over and over again hits on a whole other level.

This is the importance of failing fast. You can’t achieve success without failure — I would not have achieved a successful build if it weren’t for all of those failed builds.
But anyway, after figuring that out, my Google Cloud deployment is officially successful. Now, what can possibly go wrong? The app has to work, right? Excited, I send a message to Amy, asking her to test out the app.
The first thing she sends back is a bunch of errors.

A console log reveals the cause:

The CORS strikes again.
Turns out, the Chrome extension I installed earlier that I thought solved my cross-origin sharing problems is actually what prevented me from noticing this error when running on my end.
The concept behind CORS is that browsers automatically do not allow requests to go through when the frontend and backend are not of the same domain, for privacy reasons—so that not everyone can make a request to your backend and get your data; only whitelisted URLs can. Thus, the reason my app was breaking was that I don’t have my frontend whitelisted.
The Chrome extension had provided a temporary solution—by getting my browser to allow CORS, the Maxcut requests had gone through when I ran the app. But that was only when I ran it—everyone else would get the CORS error.
Turns out, CORS in Flask is pretty easy. Just one installation and add 2 lines of code:
pip install -U flask-corsThen import with from flask_cors import CORS and add CORS(app) underneath app = Flask(__name__), making a combined total of:
from flask import Flask
from flask_cors import CORS

app = Flask(__name__)
CORS(app)

@app.route("/")
def helloWorld():
 return "Hello, cross-origin-world!"
Potential problem: now, I’ve allowed cross origin sharing for any frontend. So, this means, you can request my backend too!
However, there are no privacy concerns since this is just a quantum algorithm — if you can request this server, there’s nothing you can steal that’s not already public. It’s all good here.
Now, Maxcut should work. There is no reason in the world that the app shouldn’t work.
Amy sends me what she sees on her side:

On Thursday, May 20, 2 weeks and 2 days after first touching a React tutorial, a week and a half after initializing the Git repo of this project and 1 week after I first got my server set up, I can finally say that Maxcut works. Now, I can say that you can officially run a quantum machine learning algorithm no-code. This marks the end of 2 weeks of web development.
You can check it out at maxcut.vercel.app. Instructions for usage & the GitHub repositories are included :^)
— —
I had dreamed of “learning to code” for a few years.
In the past 2 weeks, I put all my waking energy to webdev — from tutorials to The Prioritizer to Updately to Maxcut. Now, I guess I can say that I have the competence now to do basic stuff with React and API functions and backend stuff.
Everything I learned in 2 weeks:
React.js
Vanilla JS syntax
Flask
Git
Axios
useSWR
a bit of Next.js
Command prompt in VSCode 🤯
Heroku
Vercel
Google Cloud
Virtual environments (in Python)
Looking back, I guess it wasn't a waste of 16 days. I guess I made a decent amount of progress. How 2 weeks ago, I didn’t know how to use Git in the command line and how whenever I saw someone else using command prompt, I would feel bad, my brain would be screaming like AAAAAH that’s the thing I want to do but I’m not working on. 2 weeks ago, I didn’t pronounce Git properly, saying it with a soft G like how I pronounce gif (I'm sorry).
How, as I type Git commands quickly in VSCode terminal & getting useful info from it, I can know that 2-week-ago me would’ve gawked.
I remember how a few months ago, when asked if HTML was a programming language, I said, “I hope so, because if HTML isn’t a programming language, then I don’t know any programming language.”
I guess now, after learning Java for AP CS and solidifying my Python through QML, I can say I know JS, Python, and Java, which means I have fulfilled my childhood dream of being able to say “I know how to code.”
But haha within software devs, “knowing to code” doesn’t matter. It’s about developing software. It's about building and shipping.
I still have a long way to go if I want to contribute value towards legit software projects. Samson said it took him ~2 months to become a competent dev. Wow. That’s not a lot of time, compared to what I thought — 4 years of a software engineering degree to be able to get a software job. Which means, exciting things are on the horizon for me if I put my next few weeks towards dev at the same pace I went over the last few.
But moreover, what the last weeks did for me is that it solidified my confidence in myself to figure things out. I didn’t watch many tutorials on backend and none on APIs; instead, just looking at Updately/Postulate/Sentiment code, then using first principles experimentation to determine what each line of code does. I was able to make somewhat useful changes to Updately that somewhat created value for someone else.
If I want to, I have the option of working on the Beta Testing Manager — a webapp that is Samson’s idea and I can build out for him. This would be something built from the ground up by me and would be something “a level of complexity higher than Updately and closer to that of Postulate,” as Samson says.
Woah. If I could build something to the level of Postulate, that would have been beyond my wildest expectations at the beginning of May, when I clicked on my first React tutorial.
I spent 2 weeks to go from zero to one in webdev. Next up — go from one to ten?
Comments (loading...)
Dev/CS
Builders gonna build baby